Configuration: Signals
Signals flag opportunities and risks across your customer base so your CSMs can take action the moment something relevant happens in ImpactPilot. This article walks you through how to set them up so the right signals reach the right people.
This article explains:
- Where to configure Signals
- How to activate the default signals
- The two trigger types: property-based and engagement-based
- How to create a new signal step by step
- How to set up the actions a CSM can take
Important: Signals are configured in the ImpactPilot web app (app.impactpilot.io), not in HubSpot. This is usually done by an ImpactPilot admin.
1. Where to configure Signals
- Open the ImpactPilot web app (outside of HubSpot).
- Click your name in the top right.
- Go to Settings → Signals.
Here you'll find all of your signals, including the ones available by default.

2. Activating default signals
ImpactPilot comes with a set of default signals out of the box. If any of them resonate with your business, you can simply activate them, no further configuration needed.
If you'd like to build your own, continue to the next section.
3. Trigger types: property-based vs engagement-based
Before creating a signal, it helps to understand the two types of triggers available:
|
Trigger type |
What it looks at |
| Property-based | A specific HubSpot property, ImpactPilot checks whether its value has changed or matches a value you define. |
| Engagement-based | Your engagement with the customer, emails, meetings, and calls. ImpactPilot reads the notes from those events and triggers when it detects the topic you've defined. |
4. Creating a new signal
Click Create signal. Creating a signal happens in three steps.
Step 1: Details

- Choose a trigger type
- Enter a signal name (e.g. a name for your opportunity signal).
- Assign an agent (e.g. the Opportunity agent).
- Set the priority (e.g. High).
- Click Continue.
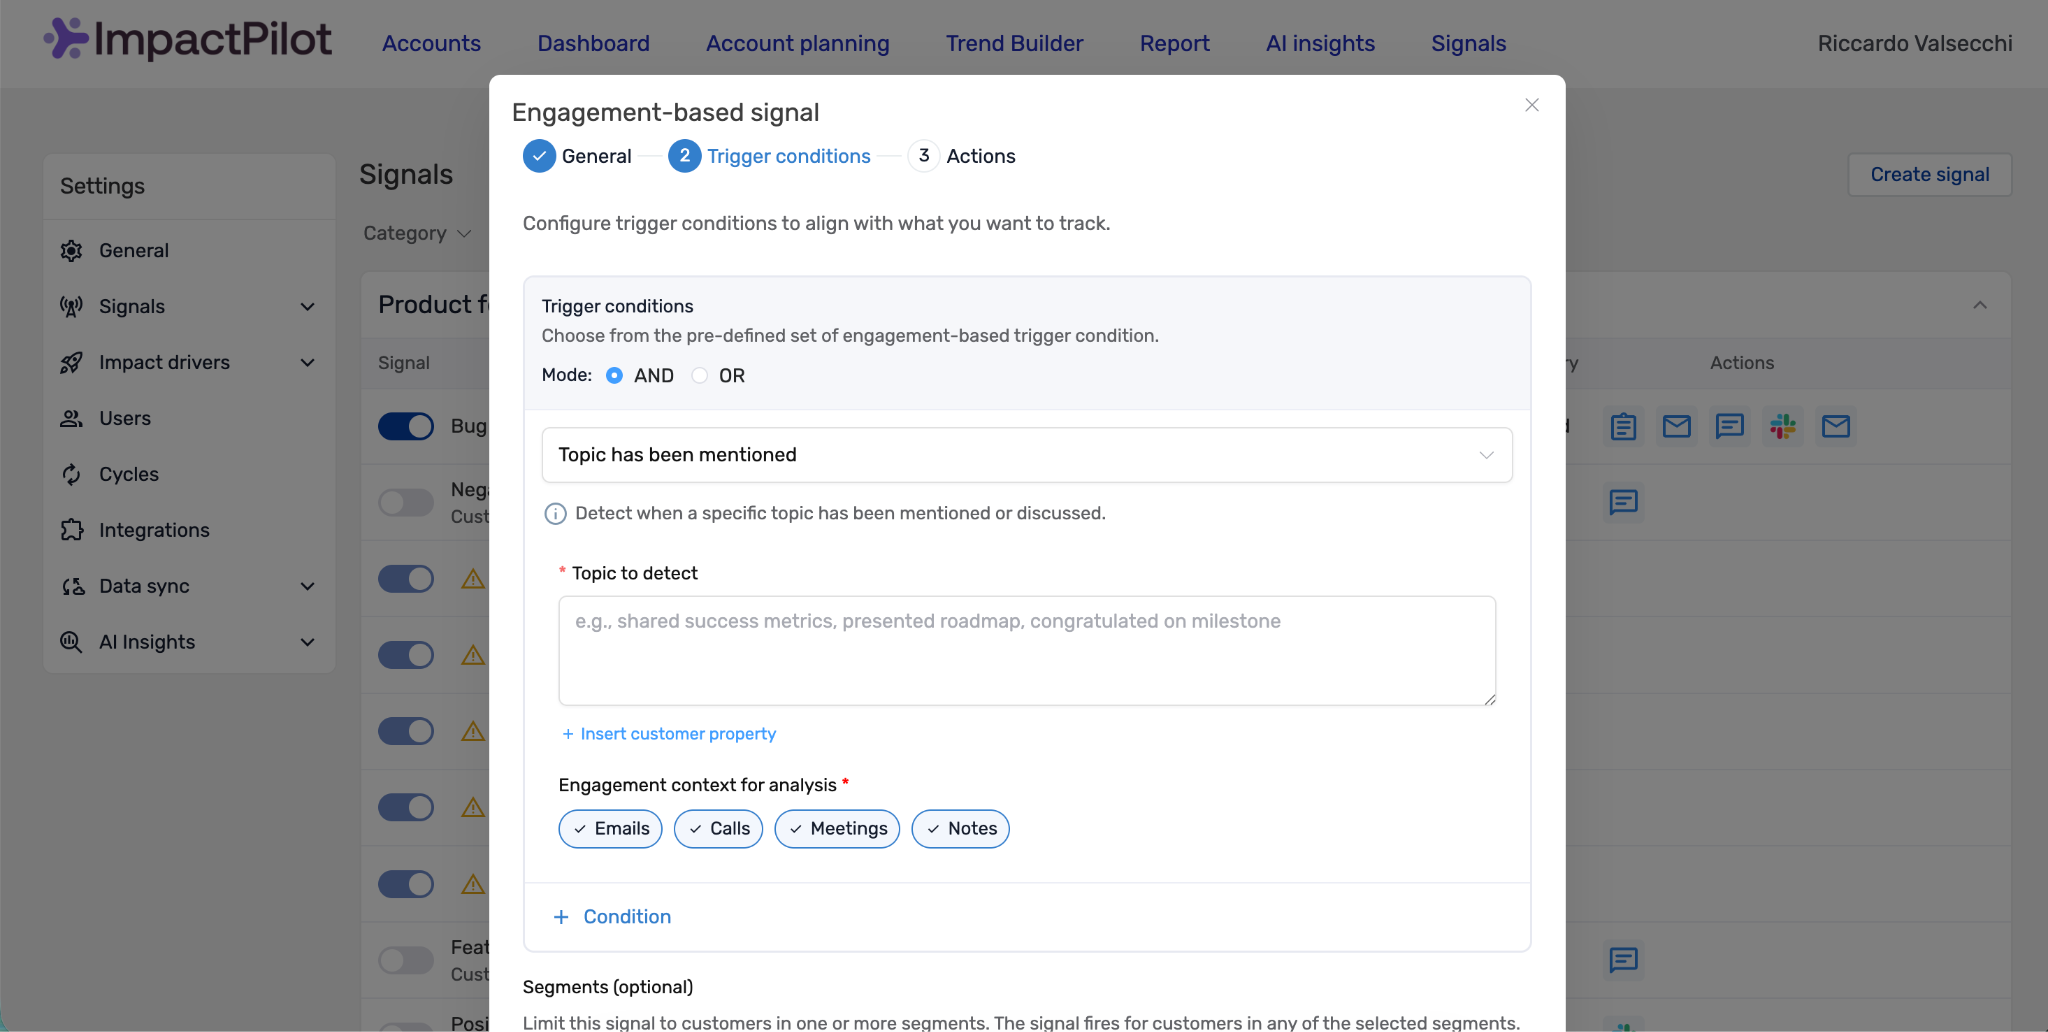
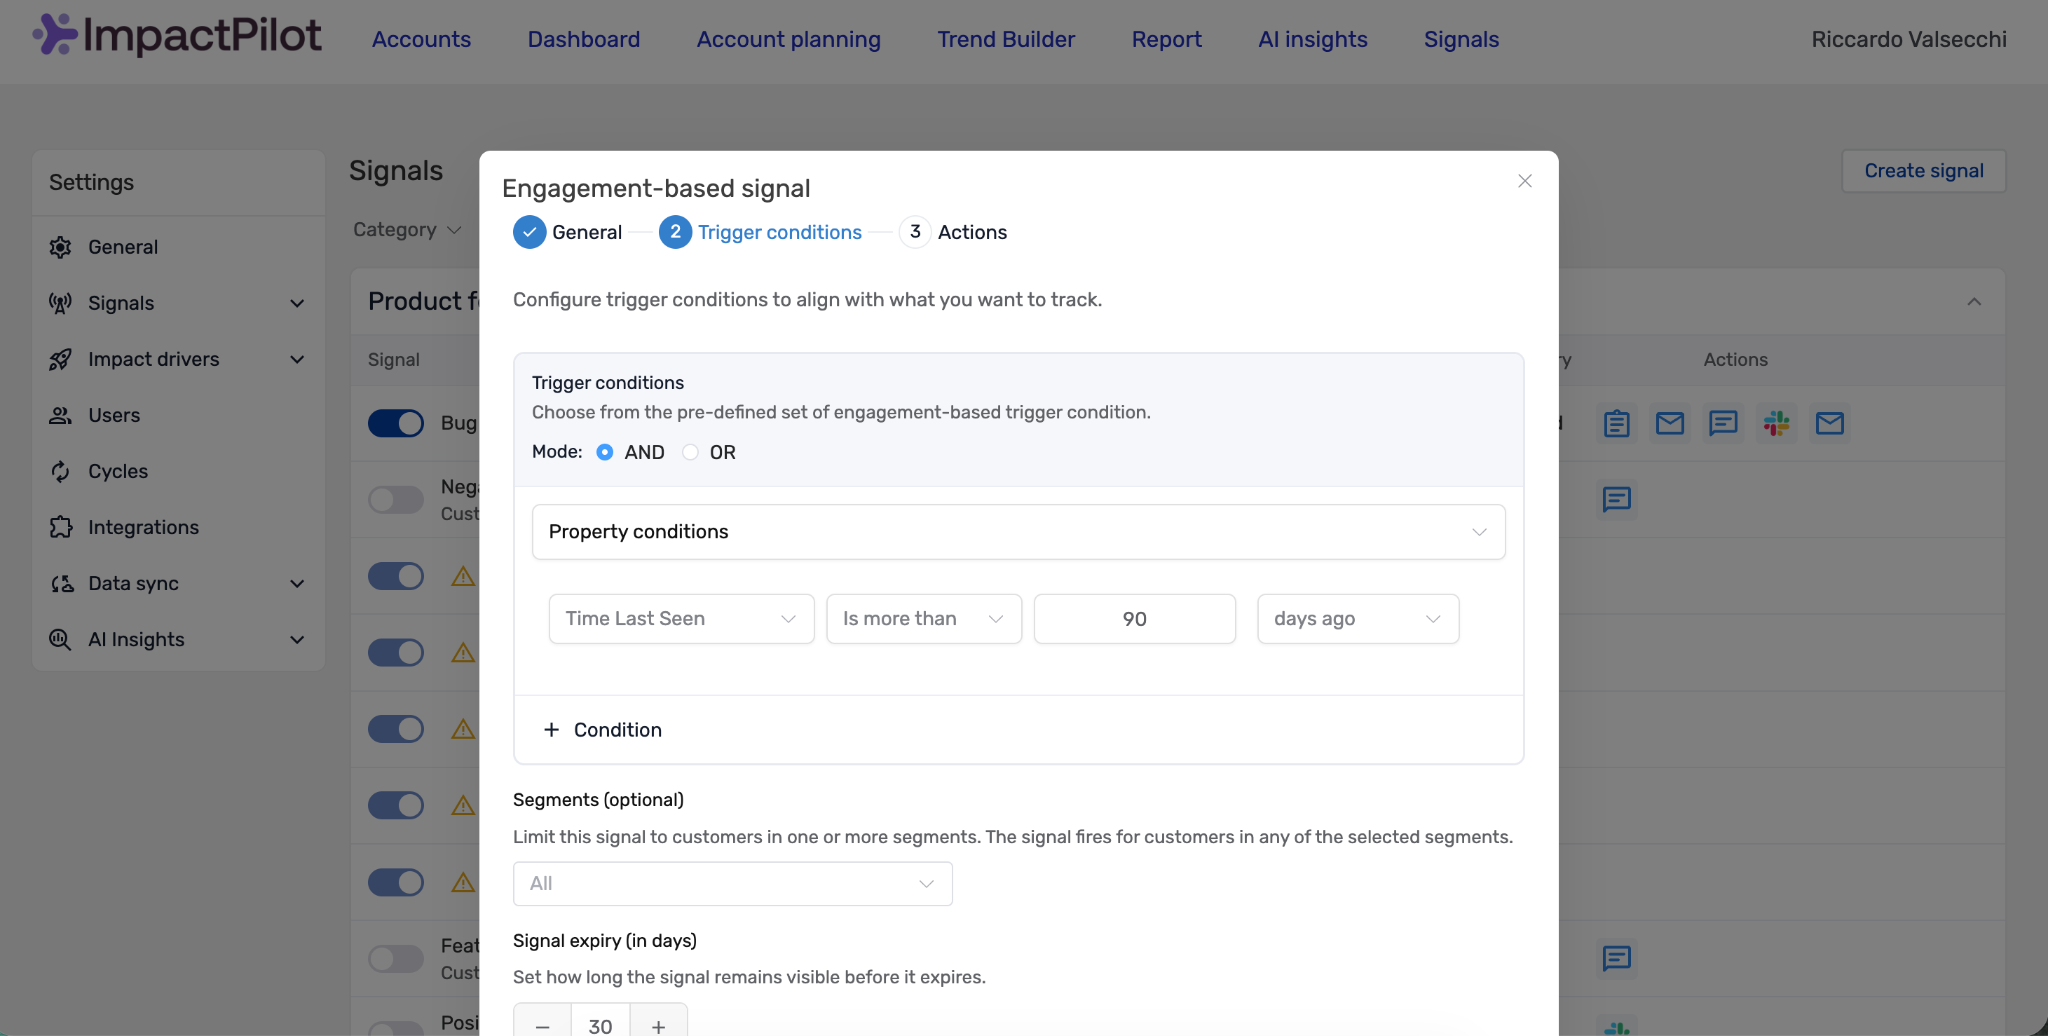
Step 2: Trigger conditions
This is where you define what makes the signal fire. The options depend on the trigger type you choose.
For an engagement-based signal:
- Trigger source : choose whether to detect when the customer has communicated about the topic, the user, or both. For an opportunity signal, you'd typically select customer.
- Topic to detect : describe what should trigger the signal, for example the customer wanting more seats. When ImpactPilot detects this in your engagement notes, it creates a signal.
- Segment (optional) : by default the signal runs for all customers. To limit it to a specific group, configure a segment beforehand and then select it here.
- Signal expiry : set the number of days after which the signal automatically disappears from ImpactPilot, even if no action was taken. You can change this value.
-
Description : add a short description of the signal.

For a property-based signal:
Switch the trigger type to Property-based, then:
- Select the HubSpot property to monitor.
- Choose the operator : equals or is any of.
-
Select the value(s) that should trigger the signal.

Step 3: Actions

In the final step, choose which actions a CSM can take when this signal appears. For an opportunity signal, you'd typically enable Create a deal and possibly Create a task.
The available actions are:
- Create a deal
- Create a task
- Chat message
- Summary
For each content-generating action (task, email, chat message, and summary), you can add a guidance prompt. This prompt steers how ImpactPilot generates that content — for example, asking for a short chat message or email.
👉 Not sure what to write? See our prompt examples article in the Help Center for inspiration.
If you enable Create a deal, configure where the deal should land, for example, the Upsell pipeline at the Opportunity Identified stage.
When everything is set, click Complete to save your signal.
5. Summary
To configure Signals you can:
- Open Settings → Signals in the ImpactPilot web app.
- Activate any default signals that fit your business.
- Choose between property-based and engagement-based triggers.
- Create a signal in three steps: details, trigger conditions, and actions.
- Define the actions CSMs can take and guide content generation with prompts.
Your configured signals will now appear for your CSMs in HubSpot, ready to act on.
✅ Next step: Now that your signals are set up, learn how your CSMs can act on them in the Signals article.
Still have questions? Reach out to support@impactpilot.io or browse the rest of the Help Center.